Skip to content
Mistfall HunterFIELD GRIMOIRE

Patch 15 September 2026 update
Updated 2026-09-16

Mistfall Hunter Brandrgarde Map and Extraction Guide

A complete launch-version plan for Brandrgarde: vertical routes, Normal and Cataclysm requirements, shrinking safe zones and how to locate a random Returner Woodling by aura and sound.

The short answer

Brandrgarde is the harder map: a multi-phase safe zone shrinks around you and the routes run vertically. Extraction is a random Returner Woodling, and you find it by its pulsing blue aura and bell.

Open the Brandrgarde map ↓

Best for
Experienced squads ready for tighter PvP rotations
Mist behaviour
Multi-phase shrinking safe zone
Extraction tell
Random Woodling with a pulsing blue aura and bell sound
Difficulties
Normal and Cataclysm
Applies to 15 September 2026 updateUpdated

By

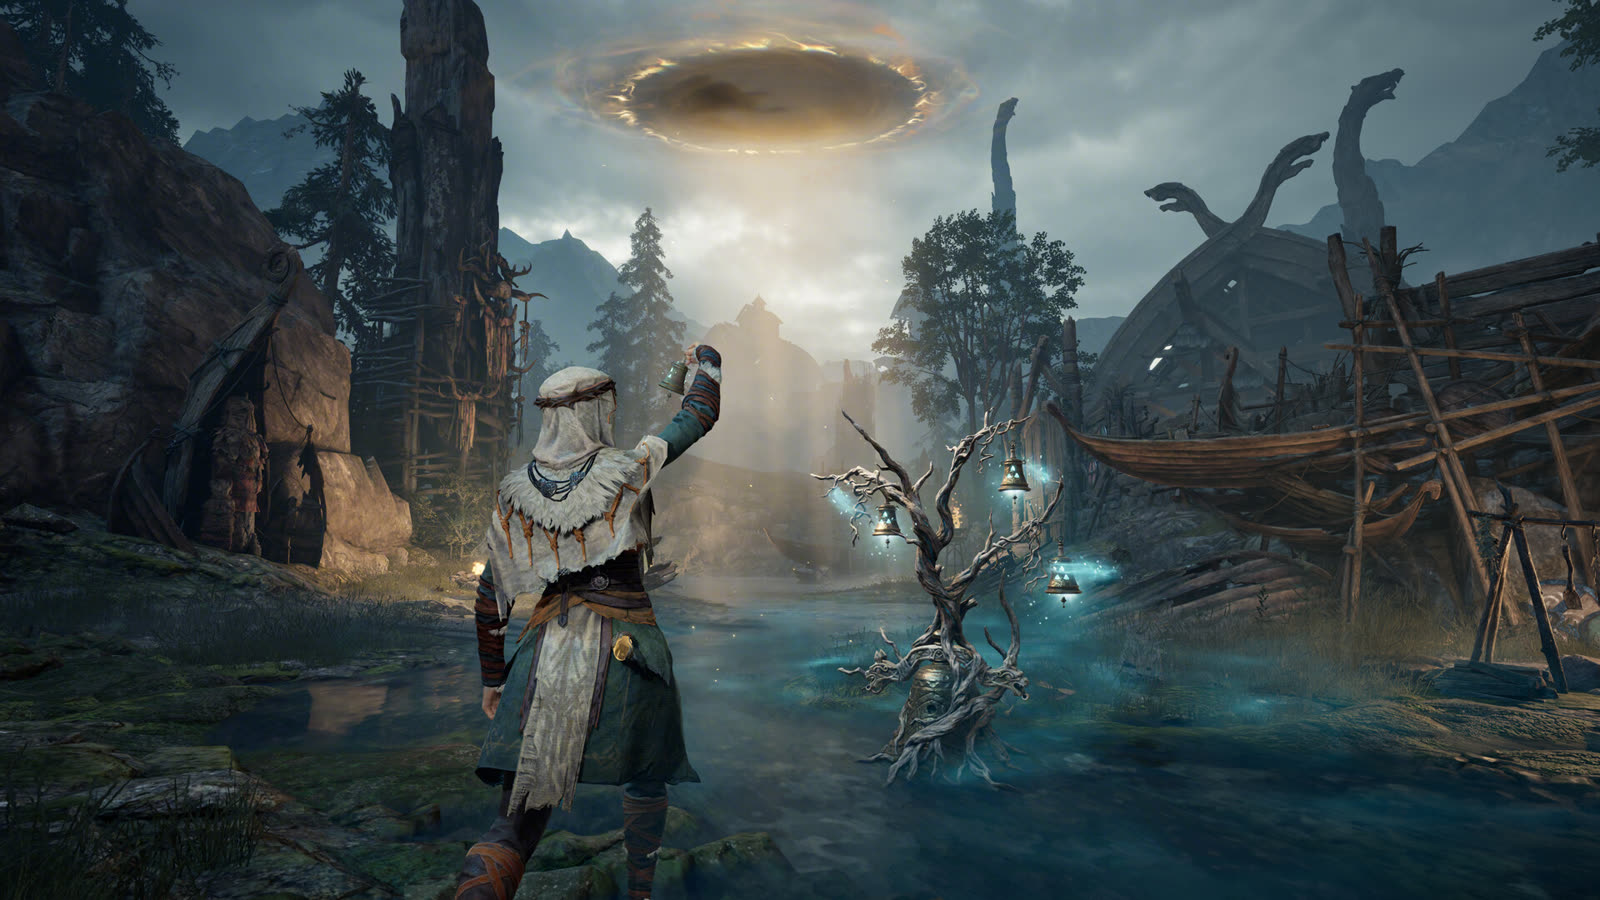
A Gyldhunter exploring a ruined waterfront
Image: Official Mistfall Hunter Steam store

How the two maps extract

Hallowgrove hands you the start of the chain. Brandrgarde does not. Every stage below is the same objective solved two different ways.

Hallowgrove

Brandrgarde — this page

The clock you are racing

A timer bar, then a hard cutoff

A timer bar sits in the top right. Until it fills you can explore and fight without worrying about the mist. When it elapses the Gyldenmist collapses almost instantly — not a circle creeping inward.

A shrinking safe zone, in phases

The Gyldenmist collapses to a safe zone over multiple phases, smaller each time, until it consumes the map. Standing outside it deals enormous damage — far more than a typical battle royale.

§01 Where the chain starts

Chimes are already standing

Returner chimes are already standing at several spots when the expedition begins, which gives Hallowgrove a much wider extraction window.

There are no chimes

Nothing is placed for you. This is the single most important difference between the two maps, and the mistake that gets new players killed waiting for a prompt that never comes.

§02 Finding the Returner Woodling

Follow the butterflies

Interacting with a chime sends a burst of butterflies toward a nearby spot. A short timer runs, then a Returner Woodling spawns there and attacks you.

Hunt the blue aura

Woodlings spawn at random locations instead. Find them by the pulsing blue aura that stays visible through terrain, and by their bell sound.

§03 Getting the bell

Kill it, then channel

Kill the Woodling, interact with its corpse and channel the return spell.

Kill it — one bell guaranteed

One bell is guaranteed per match with a chance of more. A rare bell can also be found on the ground.

§04 Leaving

The channel completes

A bell rings on completion. Clear the area before you start.

The bell is audible to anyone nearby — this is when you are most likely to be jumped

Leave whenever you choose

The bell occupies a dedicated slot, so once you are holding one you can leave at any time — including alone, which changes squad dynamics instantly.

The clock you are racing

Hallowgrove

A timer bar, then a hard cutoff

A timer bar sits in the top right. Until it fills you can explore and fight without worrying about the mist. When it elapses the Gyldenmist collapses almost instantly — not a circle creeping inward.

Brandrgarde — this page

A shrinking safe zone, in phases

The Gyldenmist collapses to a safe zone over multiple phases, smaller each time, until it consumes the map. Standing outside it deals enormous damage — far more than a typical battle royale.

§01 Where the chain starts

Hallowgrove

Chimes are already standing

Returner chimes are already standing at several spots when the expedition begins, which gives Hallowgrove a much wider extraction window.

Brandrgarde — this page

There are no chimes

Nothing is placed for you. This is the single most important difference between the two maps, and the mistake that gets new players killed waiting for a prompt that never comes.

§02 Finding the Returner Woodling

Hallowgrove

Follow the butterflies

Interacting with a chime sends a burst of butterflies toward a nearby spot. A short timer runs, then a Returner Woodling spawns there and attacks you.

Brandrgarde — this page

Hunt the blue aura

Woodlings spawn at random locations instead. Find them by the pulsing blue aura that stays visible through terrain, and by their bell sound.

§03 Getting the bell

Hallowgrove

Kill it, then channel

Kill the Woodling, interact with its corpse and channel the return spell.

Brandrgarde — this page

Kill it — one bell guaranteed

One bell is guaranteed per match with a chance of more. A rare bell can also be found on the ground.

§04 Leaving

Hallowgrove

The channel completes

A bell rings on completion. Clear the area before you start.

The bell is audible to anyone nearby — this is when you are most likely to be jumped

Brandrgarde — this page

Leave whenever you choose

The bell occupies a dedicated slot, so once you are holding one you can leave at any time — including alone, which changes squad dynamics instantly.

  • A step you perform
  • Something this map does not have
  • Announces you to other players

Summarises “Extraction on Hallowgrove” and “Extraction on Brandrgarde” below. No positions, timings or drop rates are added — none are published.

Prepare the Solo boss fight

September 4 creator demonstrations now give Harald, Flesheater and Sálmar practical move timings. Check the map and queue separately before committing a kit.

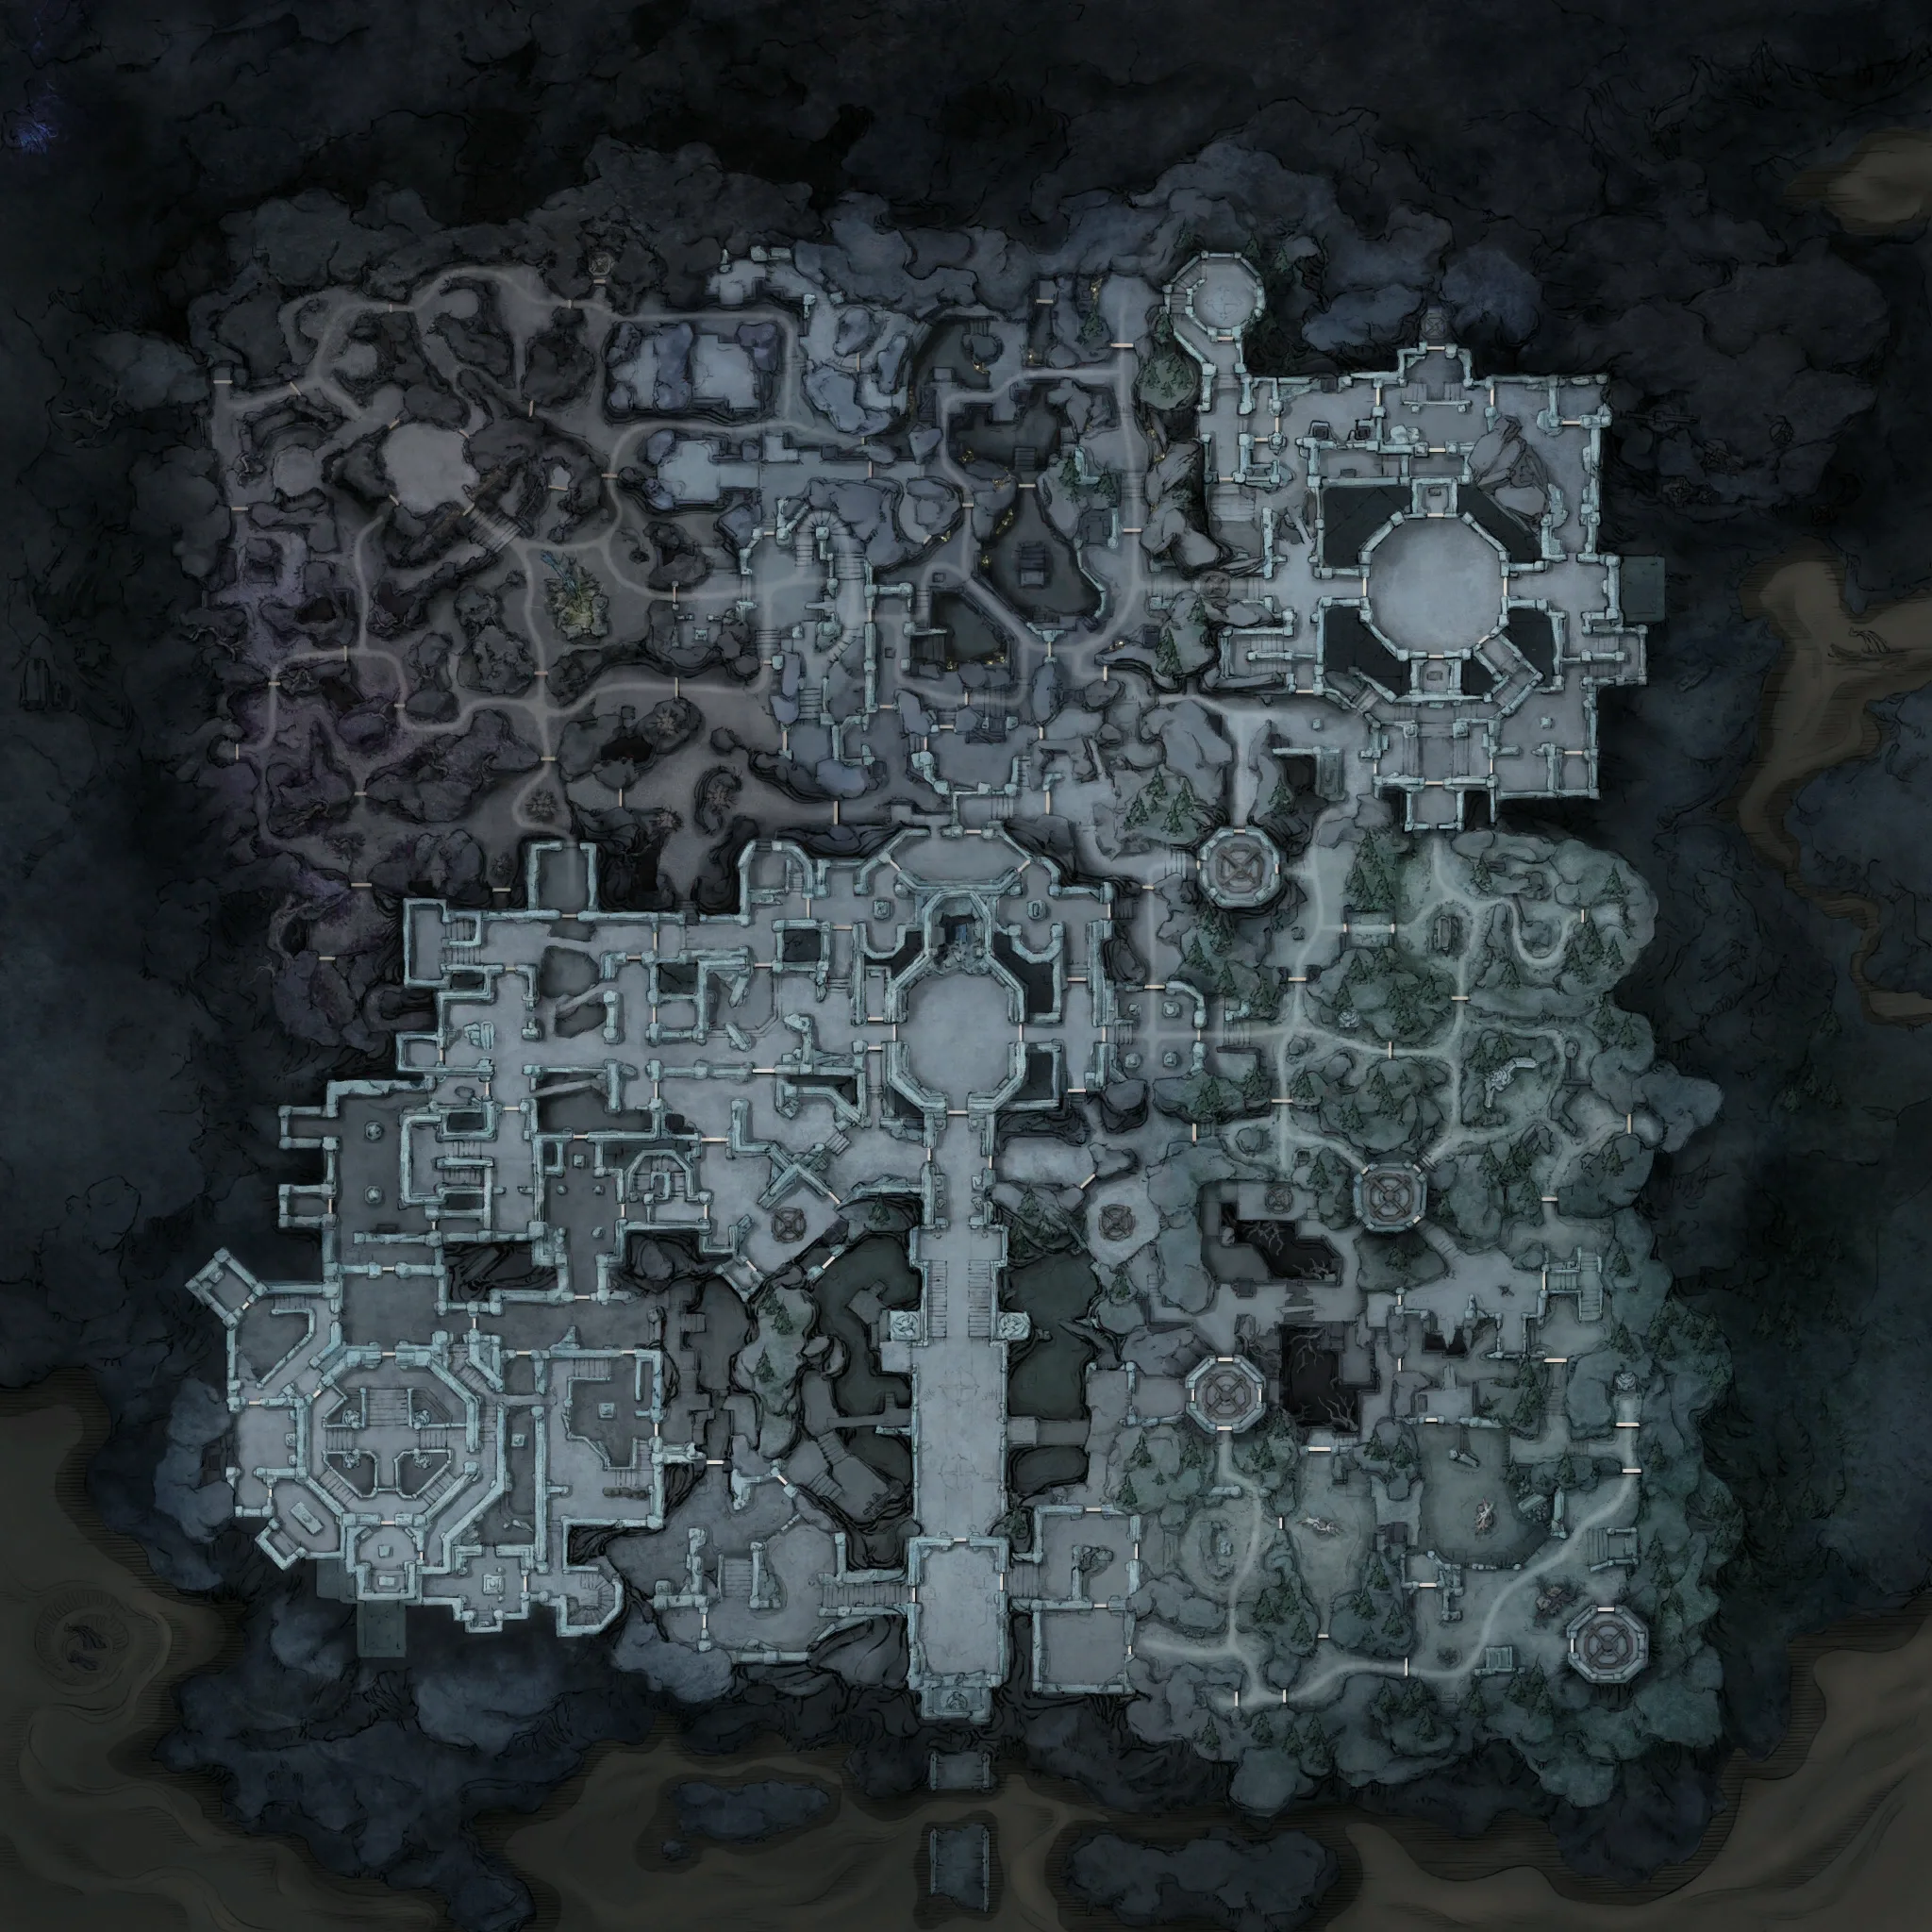
Brandrgarde field atlas

Open the full atlas →

Locked to Brandrgarde. Fixed exits and area labels are stable; rift pins, containers and elite spawns are candidates a match chooses from at runtime. Layers tagged SRC are imported rather than surveyed here — where each layer comes from.

Brandrgarde · field atlas

Vertical squad map · 1147 navigation points

Brandrgarde in-game map
100%
53 / 1147 pins

Every Brandrgarde marker, in text

The same dataset the atlas draws, written out so it can be read, searched and linked without loading the map. Map-grid values are the atlas’s own 0–10,000 system; world values are the corresponding game-world coordinates.

Brandrgarde plots 2 fixed escapes, 38 warp rift candidates, 13 merchants, 74 resurrection spots, 112 spawn-in points, 59 task objectives, 13 traversal points, 119 elites and lords, 120 loose loot and airdrops, 597 containers across 8 named areas.

Brandrgarde extraction clock

Times are read off the countdown in the game’s top right, so a larger number happens earlier in the match.

Normal · trio

  • 12:00A warp rift opens
  • 11:00The fixed gate closes
  • 09:00A warp rift opens
  • 08:052 Soul Ferries open

Cataclysm · trio

  • 12:00The end-zone warp rift opens
  • 08:052 Soul Ferries open

Warp rift candidates

38

A rift can open at a subset of these candidates each match.

Merchants

13

Possible in-raid merchant positions.

Resurrection spots

74

Soul Cocoon positions used to recover a downed teammate.

  • Resurrection spot 01 1
  • Resurrection spot 02 1
  • Resurrection spot 03 1
  • Resurrection spot 04 1
  • Resurrection spot 05 1
  • Resurrection spot 06 1
68 more types · 68
  • Resurrection spot 07 1
  • Resurrection spot 08 1
  • Resurrection spot 09 1
  • Resurrection spot 10 1
  • Resurrection spot 11 1
  • Resurrection spot 12 1
  • Resurrection spot 13 1
  • Resurrection spot 14 1
  • Resurrection spot 15 1
  • Resurrection spot 16 1
  • Resurrection spot 17 1
  • Resurrection spot 18 1
  • Resurrection spot 19 1
  • Resurrection spot 20 1
  • Resurrection spot 21 1
  • Resurrection spot 22 1
  • Resurrection spot 23 1
  • Resurrection spot 24 1
  • Resurrection spot 25 1
  • Resurrection spot 26 1
  • Resurrection spot 27 1
  • Resurrection spot 28 1
  • Resurrection spot 29 1
  • Resurrection spot 30 1
  • Resurrection spot 31 1
  • Resurrection spot 32 1
  • Resurrection spot 33 1
  • Resurrection spot 34 1
  • Resurrection spot 35 1
  • Resurrection spot 36 1
  • Resurrection spot 37 1
  • Resurrection spot 38 1
  • Resurrection spot 39 1
  • Resurrection spot 40 1
  • Resurrection spot 41 1
  • Resurrection spot 42 1
  • Resurrection spot 43 1
  • Resurrection spot 44 1
  • Resurrection spot 45 1
  • Resurrection spot 46 1
  • Resurrection spot 47 1
  • Resurrection spot 48 1
  • Resurrection spot 49 1
  • Resurrection spot 50 1
  • Resurrection spot 51 1
  • Resurrection spot 52 1
  • Resurrection spot 53 1
  • Resurrection spot 54 1
  • Resurrection spot 55 1
  • Resurrection spot 56 1
  • Resurrection spot 57 1
  • Resurrection spot 58 1
  • Resurrection spot 59 1
  • Resurrection spot 60 1
  • Resurrection spot 61 1
  • Resurrection spot 62 1
  • Resurrection spot 63 1
  • Resurrection spot 64 1
  • Resurrection spot 65 1
  • Resurrection spot 66 1
  • Resurrection spot 67 1
  • Resurrection spot 68 1
  • Resurrection spot 69 1
  • Resurrection spot 70 1
  • Resurrection spot 71 1
  • Resurrection spot 72 1
  • Resurrection spot 73 1
  • Resurrection spot 74 1

Spawn-in points

112

Candidate player insertion positions at the beginning of a match.

  • Spawn-in point 01 1
  • Spawn-in point 02 1
  • Spawn-in point 03 1
  • Spawn-in point 04 1
  • Spawn-in point 05 1
  • Spawn-in point 06 1
106 more types · 106
  • Spawn-in point 07 1
  • Spawn-in point 08 1
  • Spawn-in point 09 1
  • Spawn-in point 10 1
  • Spawn-in point 100 1
  • Spawn-in point 101 1
  • Spawn-in point 102 1
  • Spawn-in point 103 1
  • Spawn-in point 104 1
  • Spawn-in point 105 1
  • Spawn-in point 106 1
  • Spawn-in point 107 1
  • Spawn-in point 108 1
  • Spawn-in point 109 1
  • Spawn-in point 11 1
  • Spawn-in point 110 1
  • Spawn-in point 111 1
  • Spawn-in point 112 1
  • Spawn-in point 12 1
  • Spawn-in point 13 1
  • Spawn-in point 14 1
  • Spawn-in point 15 1
  • Spawn-in point 16 1
  • Spawn-in point 17 1
  • Spawn-in point 18 1
  • Spawn-in point 19 1
  • Spawn-in point 20 1
  • Spawn-in point 21 1
  • Spawn-in point 22 1
  • Spawn-in point 23 1
  • Spawn-in point 24 1
  • Spawn-in point 25 1
  • Spawn-in point 26 1
  • Spawn-in point 27 1
  • Spawn-in point 28 1
  • Spawn-in point 29 1
  • Spawn-in point 30 1
  • Spawn-in point 31 1
  • Spawn-in point 32 1
  • Spawn-in point 33 1
  • Spawn-in point 34 1
  • Spawn-in point 35 1
  • Spawn-in point 36 1
  • Spawn-in point 37 1
  • Spawn-in point 38 1
  • Spawn-in point 39 1
  • Spawn-in point 40 1
  • Spawn-in point 41 1
  • Spawn-in point 42 1
  • Spawn-in point 43 1
  • Spawn-in point 44 1
  • Spawn-in point 45 1
  • Spawn-in point 46 1
  • Spawn-in point 47 1
  • Spawn-in point 48 1
  • Spawn-in point 49 1
  • Spawn-in point 50 1
  • Spawn-in point 51 1
  • Spawn-in point 52 1
  • Spawn-in point 53 1
  • Spawn-in point 54 1
  • Spawn-in point 55 1
  • Spawn-in point 56 1
  • Spawn-in point 57 1
  • Spawn-in point 58 1
  • Spawn-in point 59 1
  • Spawn-in point 60 1
  • Spawn-in point 61 1
  • Spawn-in point 62 1
  • Spawn-in point 63 1
  • Spawn-in point 64 1
  • Spawn-in point 65 1
  • Spawn-in point 66 1
  • Spawn-in point 67 1
  • Spawn-in point 68 1
  • Spawn-in point 69 1
  • Spawn-in point 70 1
  • Spawn-in point 71 1
  • Spawn-in point 72 1
  • Spawn-in point 73 1
  • Spawn-in point 74 1
  • Spawn-in point 75 1
  • Spawn-in point 76 1
  • Spawn-in point 77 1
  • Spawn-in point 78 1
  • Spawn-in point 79 1
  • Spawn-in point 80 1
  • Spawn-in point 81 1
  • Spawn-in point 82 1
  • Spawn-in point 83 1
  • Spawn-in point 84 1
  • Spawn-in point 85 1
  • Spawn-in point 86 1
  • Spawn-in point 87 1
  • Spawn-in point 88 1
  • Spawn-in point 89 1
  • Spawn-in point 90 1
  • Spawn-in point 91 1
  • Spawn-in point 92 1
  • Spawn-in point 93 1
  • Spawn-in point 94 1
  • Spawn-in point 95 1
  • Spawn-in point 96 1
  • Spawn-in point 97 1
  • Spawn-in point 98 1
  • Spawn-in point 99 1

Task objectives

SRC59

Where mission and exploration tasks send you. Named tasks carry their own wording.

  • Possible mission objective 35
  • Soul Hunt altar 6
  • Investigate the designated location in Brandrgarde 2
  • Requires a Gyldening Intensity of Cataclysm: Investigate the designated location in Brandrgarde 2
  • Find the lost treasure in Brandrgarde 1
  • Find the Stinky hidden in the center of the training grounds in Cataclysm mode 1
12 more types · 12
  • Find the Stinky hidden near the "bluish bridge" in Cataclysm mode 1
  • Find the Stinky hidden where gold and stone melt in Cataclysm mode 1
  • Head to Brandrgarde's mining quarter and search for the forging blueprint 1
  • In Chaos or Cataclysm mode, enter a match with only weapons, rings, and necklaces equipped: Investigate the designated location in Brandrgarde 1
  • Investigate deep within the Brandrgarde mine 1
  • Investigate the area near the Spirit Tower in Brandrgarde 1
  • Investigate the Mistchasers' camp in Brandrgarde 1
  • Mark resource points in Brandrgarde's Forest Altar 1
  • Mark resource points in Brandrgarde's Mining Quarter 1
  • Mark resource points in Brandrgarde's Prison 1
  • Search for belongings near the Oath Bridge in Brandrgarde 1
  • Survey and map Brandrgarde outpost 1

Traversal points

SRC13

Ladders, updrafts and climbs that change which floor you are on. Not the same thing as a warp rift.

Elites and lords

SRC119

Elite and named enemy positions, including Mist Lords. Ordinary trash spawns are deliberately not plotted.

  • Elite Corroded Soldier 43
  • Elite Corroded Priest 33
  • General's Guard 10
  • Elite Lizardfolk Warrior 7
  • Brandrgarde Captain 6
  • Foul Hound Alpha 5
4 more types · 15
  • General Harald 5
  • Elite Corroded Archer 4
  • Elite Berserker 3
  • Fungus Matron 3

Loose loot and airdrops

SRC120

Ground pickups and airdrop positions.

  • Witchery Woods 33
  • Drill Yard 19
  • Prison 15
  • Abyssal Reach 12
  • Main Hall 12
  • Mining Quarter 12
2 more areas · 17
  • Sacred Chamber 10
  • Oath Bridge 7

Containers

SRC597

Chests, sacks, pots and racks, by container type. Most are candidates rather than guarantees.

  • Civilian Chest 94
  • Equipment Rack 51
  • Gift of Fate 46
  • Iron Chest 41
  • The Exiled 37
  • Iron Pot 25
27 more types · 303
  • Fungus 24
  • Open Sack 22
  • Silver Chest 22
  • Handcart 21
  • Spiked Rack 18
  • Wicker Basket 18
  • Withered Nest 18
  • Small Ore Pile 17
  • Woodpile 17
  • Supply Crate 16
  • Standard treasure 15
  • Locker 11
  • Soulcomb Cage 11
  • Copper Chest 10
  • Gilded Chest 10
  • Hollow Stump 9
  • Goods 6
  • Jewelry Box 6
  • Medium Ore Pile 6
  • Military Chest 6
  • Straw Doll 6
  • Silver Jar 5
  • Soul Vessel 3
  • Forgotten Tomb 2
  • Large Ore Pile 2
  • Bone Urn 1
  • Nobleman’s Chest 1
§01

Verticality is the defining hazard

Brandrgarde is condensed and aggressively vertical. Routes change level constantly, corridors are tighter, and a destination that appears close on the map can still require a long rotation to reach the correct floor.

  • Preserve mobility skills for stairwells, ladders and narrow approaches where a team can body-block you.
  • Before a fight, identify the route back to the safe zone rather than assuming the direct map line is traversable.
  • Ranged sightlines are shorter than Hallowgrove, so every corner is a potential melee engage.
§02

Normal and Cataclysm are difficulty tiers, not separate maps

Brandrgarde Cataclysm is the hardest queue on the same map. The launch requirements below are easy to misread because Normal has both a minimum combined value and a cap on starting gear.

DifficultyGear requirementCombat bags allowed
NormalCombined gear value at or above 300 Gyldenblod; starting gear at or below Epic (purple)Novice, Advanced, Pro, Elite
CataclysmEquipment value at or above 2500 GyldenblodElite only

Normal

Gear requirement
Combined gear value at or above 300 Gyldenblod; starting gear at or below Epic (purple)
Combat bags allowed
Novice, Advanced, Pro, Elite

Cataclysm

Gear requirement
Equipment value at or above 2500 Gyldenblod
Combat bags allowed
Elite only
§03

Extraction: find the random Woodling

There are no Hallowgrove-style returner chimes. Returner Woodlings appear at random locations, so extraction is a search problem performed while the safe zone keeps contracting.

  • Watch for the Woodling’s pulsing blue aura, which appears briefly through terrain.
  • Listen for its bell when walls and floors make the visual cue ambiguous.
  • Kill it to secure at least one bell; more than one can drop.
  • The bell occupies its dedicated slot, and a holder can leave whenever they choose.
  • Agree who carries each bell before another squad arrives—multiple bells do not force the squad to extract together.
§04

Plan rotations one collapse ahead

The Gyldenmist closes over multiple phases and standing outside it deals extreme damage. The correct time to move is before the current safe area becomes unplayable, especially when the direct path crosses several floors.

  • Start each phase by locating the next usable vertical transition, not the next chest.
  • If the Woodling cue appears outside your planned rotation, decide whether the bag is worth reversing course.
  • Keep one disengage tool available until the squad is on the correct floor of the safe zone.
  • Once a bell is secured, extraction is usually worth more than contesting one additional gold loot zone.
§05

Cataclysm preparation checklist

Cataclysm only accepts Elite combat bags and demands a high equipment-value floor. That makes every opponent expensive and every third party dangerous. Enter with an exit plan rather than treating the queue as a richer version of Normal.

  • Confirm every squad member meets the queue gate before assembling the build around them.
  • Carry enough healing to survive both the initial engagement and the rotation afterward.
  • Do not start a boss without knowing the next safe-zone floor and at least two exits from the arena.

Brandrgarde FAQ

No. Cataclysm is the highest difficulty tier on Brandrgarde. Mistfall Hunter launched with two maps total.

Sources for this page

Continue planning the run

Hallowgrove map and extraction guideCompare both maps and all difficulty gatesBosses and Mist LordsGear, loot and safe pouchSubmit a verified Brandrgarde marker